Alastair Lockie

Nuggets of JavaScript

Web Components Will Be a Pretty Big Deal

Last Wednesday I was lucky enough to attend a fascinating evening at Google, London. Glenn Jones kindly invited me to join him at an event on Web Components and Polymer.

The Polymer team have been quietly working on their baby for the last three years, but it is only starting to emerge into the limelight now.

Web Components

The core philosophy behind Web Components is to make markup meaningful again. They want to give you the ability to build your own HTML elements. For the most obvious example of this, fire up Google Chrome and add an <input type="date"> tag:

See how it’s rendered? It’s a fully functional widget, with the ability to increment/decrement values and even open up a calendar view.

Right click and inspect element. What do you see? Still the same old input tag. Now click on the little cog at the bottom right of the dev tools and click on ‘Show Shadow DOM’. Reboot the dev tools and behold! Now you have a grey #document-fragment within the input tag which shows you all the inner workings of the element.

This is a perfect example of a custom element. It has its own encapsulated styling and JavaScript behaviour, and is entirely reusable. Web Components releases this awesome power from the clutches of the browser vendors and opens it up to all.

Polymer

So what is Polymer? It is Google’s implementation of Web Components, and it sits on a collection of polyfills which make the technology possible on today’s browsers. This collection of polyfills is called ‘platform.js’, and includes:

  • Custom Elements
  • Shadow DOM
  • HTML Imports
  • Model Driven Views

It also includes a couple of polyfills for Web Animations and Pointer Events. These aren’t directly related to Web Components, but are still great shims in their own right and show that the Polymer team are working hard to bring the future of the web ever closer. Each polyfill can also be included/excluded as needed. As with all polyfills, they will become less and less necessary over time as standards are implemented.

Let’s take a quick gander at each of these polyfills for Web Components.

Custom Elements

This is what allows you to register your own HTML element. Ever wanted to have your own <this-guy> tag with two <thumb> tags? Now you can. What’s more, your <this-guy> tag can have it’s own fully encapsulated JavaScript.

As this JavaScript is not exposed to the outside world, there are some interesting side effects. Notably, inline handlers such as click may come back into fashion. Before you gasp, think about the original reasoning behind separating out behaviour from the DOM. It was (at least partly) to avoid the use of global functions. But when your code is isolated in its own little sandbox, this concern melts away. What’s more, you can do away with the messy business of adding and removing event listeners.

The same goes for CSS as well, no more big long selectors to drill down through the tree to the exact element you want. You are able to allow the outside world to style some or all of your custom element, but the choice and control is yours. For me, this encapsulation of JS and CSS is the most revolutionary part of Web Components, and I am deeply excited about it.

Shadow DOM

The Shadow DOM encapsulates the innards of your custom element and just exposes a nice clean tag for you to plonk on your page. This tag can even have child nodes; the contents of which can be accessed and mashed into your custom element. Check out Google’s example:

What the user writes:

1
2
3
<my-custom-element>
  <q>Hello World</q>
</my-custom-element>

Your Shadow DOM:

1
2
3
<shadow-root>
  <span>People say: <content></content></span>
</shadow-root>

The resulting HTML:

1
2
3
<my-custom-element>
  <span>People say: <q>Hello World</q></span>
</my-custom-element>

Dumping out the content of the my-custom-element tag is the most simple example, but it is a very flexible framework. You can use CSS selectors to grab out exactly the parts you want and insert them where appropriate.

Of course, these reusable and encapsulated elements can be compounded to make ever more complex elements, until you have an entire webapp just represented as <my-webapp>. Although this might seem anathema to some, remember that entire webapps are currently being built with no elements on the page whatsoever, in arbritrary ways. The Shadow DOM and custom elements at least provide standardisation, plus the ability to drill down into the building blocks using Dev Tools.

HTML Imports

So you’ve got your nice new shiny element. It is defined in its own file, with a script tag and styles inside. Now how to get the thing into your page? Unsurprisingly, it’s using the new HTML Import functionality. As you’d expect, this is as simple as adding a script or a stylesheet to a page; indeed it uses the <link> tag:

<link rel="import" href="import-file.html">

Job done!

Model Driven Views

MDV (Model Driven Views) is the only part of the spec currently assigned an Implementation Status of ‘In progress’. However, it is certainly far enough along to get a good idea of what it will offer. Essentially, MDV standardises the ubiquitous task of generating HTML using templates and data from a model.

If you’ve ever used mustache or a similar technology, you’ll be right at home with HTML templates. They look just the same, however they can live directly on the DOM. Crucially, though, they are parsed and not rendered. This means that you cannot access the innards of an HTML template via JavaScript, nor will any CSS or JavaScript be evaluated until it is stamped out onto the page.

MDVs are not simply templates, however. The HTML generated from the templates includes a property called “templateInstance” which stores a reference to the data used to create the template.

This means that whenever the data changes, so does the generated HTML. It even works vice versa, if a user enters a value into an input in your template which is bound to an attribute in your model, that model will get updated instantly.

MDV obviously doesn’t offer anything that a myriad of frameworks and libraries already offer, but it sure will be nice to have it standardised.


Summing Up

Polymer is a mind-boggling concept when you get your head round it. It is not a replacement for Backbone, Angular or other frameworks, but it will drastically change the way they work and the way we think about web applications for the better. The ability to build a webapp piece by piece with custom elements building on top of each other, each standalone and encapsulated is deeply exciting and feels like the right direction to be heading in.

There are some niggles still. Polyfills often support legacy browsers, however if you need to support IE 8 then you’re out of luck. Even IE 9 isn’t officially supported.

There is also a healthy ongoing discussion over how this technology should be structured. Should data be a separate tag? Should JavaScript and styling be external to the HTML file where your custom element is defined, or should it all go in one file (‘Taco-style’ as the team evocatively call it)? What will the distribution and repository system look like?

I’m also slightly wary of the ‘everything is an element’ approach. I’m completely onboard with actual custom components, but during the demonstration the Polymer team showed how Web Animations (which I haven’t covered here) will look. Each transition was a new HTML element, and personally I found it harder to grok than animations defined using JavaScript; it felt worryingly like a return to XML definitions. The team reassured me that imperative declarations would be supported, but they also made it clear that the HTML element approach was preferred.

However, this is a new and constantly changing technology. It seems to have changed fairly significantly even since the GoogleIO presentations, styling syntax in particular. What I’ve discussed here is also only a small fraction of the project, head over to http://www.polymer-project.org, and make sure to watch the two videos below which give a more comprehensive introduction to Polymer and Web Components. Lastly, download the code, join the mailing list and make your voice heard!


Starting a Coding Meetup

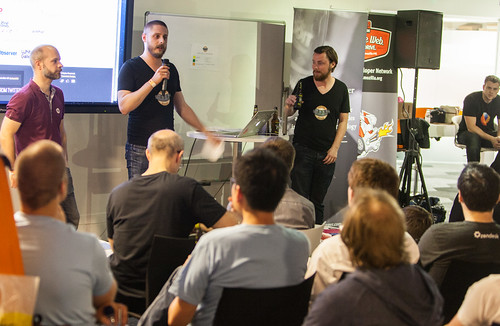
One of the best ways to increase your enjoyment as a coder is to attend a local meetup. You will make new friends and contacts with the same passions as you. You will swap stories of coding horrors and triumphs over a drink. You’ll learn the latest technologies and see them in action. Plus, it’s a great environment to test out your own ideas and public speaking skills in a safe, supportive environment.

I have been attending Async in Brighton since I moved down here, and indeed it was one of the reasons I was keen on moving to the city. We’ve had some cracking speeches in the last year or so, from such luminaries as Addy Osmani and Jake Archibald to name just a couple. I’ve certainly learned a huge amount, and would recommend anybody in the vicinity with even a passing interest in JavaScript to pop down.

But what if you don’t have a local meetup? If this is the case, I’d strongly urge you to consider organising your own meetup. Async was started by the inimitable Premasagar Rose, and when his fellow organisor Aron Carroll flew the coop to Berlin, I offered to help out. It’s been a great experience, and given me a behind-the-scenes look at how it works, and how to go about setting up such a meetup.

As with most things in life, the hardest part of organising a meetup is the start - ‘blank canvas’ syndrome. As such, here are my top tips for how to go about getting the ball rolling:

Find your audience

There’s only one crucial ingredient for a meetup and that is attendees. Chances are, you already have a few friends/acquaintances that you chat to about nerd-matters. Ask them if they’d like to have a local meetup, and if so recruit them to spread the word. Whilst you’re at it, ask if any of them would be willing to do the first speech.

If you are new to the area, try to find out who The Local Influencer is. Most places have a guy/gal who ‘just seems to know everybody’ in the community. Find them and talk to them; chances are they have already thought about starting a meetup and will either want to help, or will at least be able to put the word out for you.

Lastly, it’s worth tapping any sizeable companies in the area. Send an email explaining what you’re planning, and ask if any of their developers would be interested.

Track down a venue

Async is hosted at The Skiff, a coworking space in Brighton. If you have a coworking space nearby, this is an obvious port of call. If not, ask either your company, or one you have contact with, if you can host it in their meeting room after hours.

Function rooms at pubs could be an option, especially if the owner is happy to lease it for free on the promise that attendees buy a drink or two.

Churches, town halls and hotels could be a last resort but try to avoid having to pay for the venue as keeping the meetup free to attend is important.

Procure equipment

You might assume that you need quite a lot to get a meetup up and running, but really the only key piece of technology is a projector. Your speakers can bring their own laptop, you can just use the wall instead of a screen. A camcorder to record the talks is a nice to have, but not essential.

If you don’t have a projector yourself, and can’t borrow one off your company or the venue, it may sound obvious but just ask around. There are bound to be some other clubs in the area that have presentations - get in contact and see if they’d be willing to lend you their projector for a night. Put the word out on Twitter, people can sometimes have an old projector they bought for an ill-fated home cinema dream.

You can always buy a projector later on once you’ve had a few meetings and established a routine, but it’s good to borrow one to begin with if you can.

The first speech

Once you’ve got an audience, a venue and a projector, you’re all set. You just need a speaker for the first night. If nobody else is willing to step up to the plate, show them how it’s done! It can be a little nerve-wracking to get up in front of a bunch of professionals, but it’s easier than you think.

Talk about what you are passionate about, whether it’s a new technology, a tool that you love, or a process you’ve found really helpful.

Don’t fall into the trap of thinking that you aren’t an authority on a subject and thus have no right to speak about it - people are hungry to learn, and you know more than you think. You owe it to your audience to share your knowledge and experience, and they’ll be very grateful you did!

The secret to a great speech is the old adage ‘proper preparation prevents piss poor performance’. Write your speech with plenty of time, and then practice it repeatedly. Run through it with your partner or a family member, and again with a fellow geek.

Most importantly, try to relax. Nerves are all in your head, everyone there wants you to succeed and is encouraging. Take a deep breath, and before you know it you’ll be well into your speech and having a whale of a time.

To infinity…

Once you’ve had a few meetings, consider setting up a page on Lanyrd, Meetup.com or Eventbrite. It can be a good idea to set up a simple website as well.

Depending on the size of your village/town/whatever, you may find that you start to run out of speakers. If and when this happens, cast your net further afield. Ask similar meetups within spitting distance if they would like to share speakers. Don’t be afraid to reach out to leading figures in your field, the worst they can do is say no.

Above all, just keep the ball rolling. If you can’t find a speaker for a particular evening, why not do a ‘Show and Tell’ evening where people just speak for 5 minutes on what they’re currently interested in? Or a hacknight? It’s important early on to keep the show going so people come to expect the meetup to be happening at a certain time on a certain night, and can factor it into their schedules.


That’s it, go forth and organise! Feel free to get in touch with me for any questions, guidance, or suggestions.

Sublime Text 2: Configuration + Keyboard Shortcuts

I recently did a talk at my local JavaScript meetup (Async in Brighton) about Sublime Text 2 and Chrome Dev Tools. Afterwards, I had a few requests to post about which plugins I use, and my preferences. I also plan on posting the video of the talk, but in the meantime here are my top tips:

My Sublime Text 2 Plugins:

Remember, the first step is to install Will Bond’s package control. Once you’ve done that, just open up the command palette (Cmd + Shift + P or Ctrl + Shift + P) and type ‘install’, followed by enter. This will bring up a filterable list of all available packages.

Sublime Linter

An essential plugin, Sublime Linter saves you from future runtime headaches by pointing out missing semicolons, mis-spelled variable names etc. Works for JavaScript, CSS, and plenty more besides.

Git

Very full featured Git plugin for ST2, great integration of standard commands such as diff, status, log etc., but as an added bonus it takes your selection into account when using features such as ‘Blame’ and ‘Add Hunk’.

Github Gists

Nice little plugin for creating a Github Gist from your selection, public or private. You can also select and copy a gist to the clipboard ready for use.

Zen Coding

Adds in support for Zen Coding, a way of creating huge chunks of HTML quickly and easily using CSS selector ‘haikus’. The Github readme is a bit sparse, but remember you can just type ‘zen’ into the Sublime Text 2 command palette once the plugin is installed, and it’ll show you all the available commands. For more information on Zen Coding, check out this overview at Smashing Magazine.

Automatic Backups

One of the earliest plugins, it simply stores a copy of your file each time you save to a backup folder on your disk. You can step back through history through previous revisions of the file simply and easily, or merge two versions together. These days most of us use Git or some other form of version control, but Automatic Backups is still a nice safety net to have around.

Sidebar Enhancements

Adds a few extras to the default Sublime Text 2 sidebar, which is pretty basic straight out the box; notably more control over file management (duplicate etc.), as well as more advanced features such as advanced copy options and opening a file in the browser.

Tag

Small plugin that just gives a helping hand when writing HTML/XML, with features such as linting, formatting and auto-closing on forward slash.

Missing Palette Commands

Even smaller plugin which simply adds in some commands to the command palette. If you find something missing from there, just add it into the Missing.sublime-commands JSON file yourself!

My Sublime Text 2 Preferences

I generally find the Sublime Text 2 default preferences to be pretty sensible, but there are some nice features turned off by default so it’s definitely worth taking a gander at the settings file (just type ‘prefd’ into the command palette) to see what’s on offer. Below is my preferences file for reference; ‘Vintage’ mode is off at the moment but I plan on using it more once my Vim-fu improves.

My Sublime Text 2 Preferences
1
2
3
4
5
6
7
8
9
10
11
12
13
14
15
16
17
18
19
20
21
22
23
24
{
    // Show folders in the side bar in bold
    "bold_folder_labels": true,

    // Word list to use for spell checking
    "dictionary": "Packages/Language - English/en_GB.dic",

    // Set to true to draw a border around the visible rectangle on the minimap.
    // The color of the border will be determined by the "minimapBorder" key in
    // the color scheme
    "draw_minimap_border": true,

    "font_size": 14.0,

    // List any packages to ignore here. When removing entries from this list,
    // a restart may be required if the package contains plugins.
    "ignored_packages": ["Vintage"],

    // Set to true to insert spaces when tab is pressed
    "translate_tabs_to_spaces": true,

    // Set to true to removing trailing white space on save
    "trim_trailing_white_space_on_save": true
}

Favourite Keyboard Shortcuts

During my presentation, I wanted to show off as many features as possible in the time available, so I used keyboard shortcuts where I could. I had a few questions about what the shortcut was for certain features, so I thought I’d include them in full here.

Layout

Switch between multicolumn layouts:

Mac: Cmd + Alt + [1-4]
Win/Linux: Alt + Shift + [1-4]

Show grid layout:

Mac: Cmd + Alt + 5
Win/Linux: Alt + Shift + 5

Switch between multirow layouts:

Mac: Cmd + Alt + Shift + [1-3]
Win/Linux: Alt + Shift + [8-9]

Move focus to panel:

Ctrl + [1-4]

Move file to panel:

Ctrl + Shift + [1-4]

Distraction Free Editing:

Mac: Cmd + Ctrl + Shift + F
Win/Linux: Shift + F11

Autocompletes

Show ‘Go To’ autocomplete:

Mac: Cmd + P
Win/Linux: Ctrl + P

From within ‘Go To’ autocomplete:
’@’ = function
’:’ = line number

Show Command Palette:

Mac: Cmd + Shift + P
Win/Linux: Ctrl + Shift + P

Editing

Code folding:

Mac: Cmd + Alt + []
Win/Linux: Ctrl + Shift + []

Move line up/down:

Mac: Cmd + Ctrl + up/down
Win/Linux: Ctrl + Shift + up/down

Indent:

Mac: Cmd + []
Win/Linux: Ctrl + []

Sort Lines:

Mac: Ctrl + F5
Win/Linux: F9

Join Lines:

Mac: Cmd + J
Win/Linux: unbound by default

Selecting

Select Word:

Mac: Cmd + D
Win/Linux: Ctrl + D

Select Line:

Mac: Cmd + L
Win/Linux: Ctrl + L

Select Scope:

Mac: Cmd + Shift + Space
Win/Linux: Ctrl + Shift + Space

Select Brackets:

Ctrl + Shift + M

Multi-selecting

Select next occurrence:

Mac: Cmd + D
Win/Linux: Ctrl + D

Skip occurrence:

Mac: Cmd + K
Win/Linux: Ctrl + K

Undo selection:

Mac: Cmd + U
Win/Linux: Ctrl + U

Select all occurrences:

Mac: Ctrl + Cmd + G
Win/Linux: Alt + F3

Select block:

Mac: Alt + mouse drag
Win/Linux: Shift + right mouse drag

Add previous/next line:

Mac: Ctrl + Shift + up/down
Win/Linux: Ctrl + Alt + up/down

Add cursor:

Mac: Cmd + mouse click
Win/Linux: Ctrl + mouse click

Notes From a Hackathon

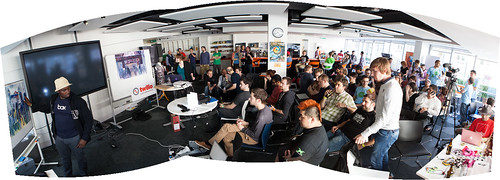
A few weeks ago I had the opportunity to attend a rather special event: the Digital Sizzle Hackathon in London. It was a rare, exhausting and stimulating weekend, and an experience that I’d thoroughly recommend to just about anyone.

The weekend kicked off with an introduction to the event on the Friday evening. The event was hosted at Mozilla HQ in Leicester Square, a sumptuous workspace ideally situated. After a quick kick-off by the event organisers and an explanation from the API providers, the call for ideas began. Any fears of a collective creative block were soon put to rest as the line of speakers grew ever larger.

The ideas flowed thick and fast, with speakers appealing to their audience’s curiosity, their appetite for a challenge, and their love of lasers. The evening wrapped up with pizza and beers, over which the teams slowly coalesced around the popular ideas. The Digital Sizzle team were admirable at making sure nobody was left without a team.

After a night’s sleep - or lack of it on my part thanks to a particularly ill-timed bout of insomnia - we reconvened at 9am to start work. Breakfast was laid on, and Mozilla’s absurdly sophisticated coffee machine revved into action (the only rule: if you were taught how to use it you then had to pass that knowledge on to at least one other person).

Plans were formalised, brains were set a’stormin’, then slowly the exicted chatter subsided into the pitter patter of determined typing. At this point, dear reader, please be patient as I indulge in a momentary digression.

As outlined in my previous post, I have only relatively recently crossed the line from ‘programmer as a day job’ to ‘programmer as a vocation’. This distinction came mainly from the realisation that I was simply using the wrong language. After using Java for most of my career, switching to liberal JavaScript was akin to a plunge into crystal cool waters following a long sauna. This is not to say, of course, that JavaScript is a superior language to Java. I merely mean that I fall more on the side of Liberalism in Steve Yegge’s scale of software ideology, thus Java was simply a wrong fit for me.

Despite my new found enthusiasm for programming however, I was initially hesitant when I heard about the hackathon. After all, I’ve only been coding full time in JavaScript for six months; surely the hackathon would be full of Linus-alikes and Wozniak-ians. I’d be left looking like a Sunday League footballer who’s stumbled into the Premier league.

I mention this as I know that I am not alone in this; I have since spoken to a few people who have expressed similar feelings. In this post, my aim is to reassure you that such concerns are baseless. As I started coding away that first morning, it dawned on me that this was not the competitive environment I feared. Rather, the whole room crackled with the energy of creative minds doing what they love the most in its purest form; unhindered by estimates, unit tests, maintainability concerns, and all the other necessary but occasionally tiresome aspects of a professional developer’s worklife.

For that weekend, we could immerse ourselves entirely on a project of our own volition, with not a care in the world. We had all the food, beer, and drink we could possibly want, and if you got stuck on an issue there was likely to be an expert within spitting distance who would be happy to help. Evening soon arrived, and with it burgers from the BBQ that put the Sizzle into Digital Sizzle. Hand on heart, one of the best burgers I’ve ever had. Despite my insomnia the previous night, it wasn’t till gone three in the morning that I found a quiet spot to lay my head. I drifted off to the sounds of some nightowls putting the world to rights in a deep philosophical debate.

I awoke 4 hours later and groggily returned to my station, coffee in hand, and was instantly immersed again. After a few hours of flow, burritos were served for lunch and it dawned on us that we only had a few hours left to pull together all the disparate threads of our project. We furiously hacked away right up until the presentation, trying to put the finishing touches together but alas we didn’t manage to match up the audio with the visuals in time.

After a marathon coding session, the reward of the project presentation was fantastic. Here were a few highlights that stuck out for me, although with 24 projects in total there are too many gems to list here: * Twitter killed my bunny - a game where a tweet-powered bunny tried to escape the ‘Negativity crusher’, which came slamming down when the sentiment from social networks turned sour. * Real weather - an arduino powered spectacle involving water pumped up and over corrugated plastic to simulate rain, a fan for the wind, and a lightbulb for the sun. * Karakilio - a breathtakingly ambitious spotify-powered karaoke app played over mobile phones. Unfortunately it succumbed to the curse of the demo, but it was a great idea. * Data necklace - the most beautiful example of geek love I’ve ever seen. A talented Romeo used a nearby laser cutting shop to create plastic necklaces containing, amongst other things, batons whose size were determined by the number of tweets about a recent celebrity death. It was a macabre but touching gift for his (no doubt slightly bemused) wife.

After seeing water pumps being tested in the shower at two in the morning, or hearing the occasional yells which constitued the testing for “Scream Ball”, it was really great to see these projects finished and in the flesh. The devils of presentation visited a few poor presenters, but on the whole it was inspiring and humbling to see what people had been able to create in a weekend. I also learned that it’s very important to put a bit of time and energy into the presentation of your project. Our team lead did a fantastic job given the circumstances, but whilst we’d spent the last precious moments feverishly hacking away, other teams had put together a great slideshow explaining their concept and what they were trying to achieve. It makes a big difference.

On the whole, I found the hackathon to be a hugely rewarding and enjoyable experience. Regardless of your experience or perceived competence, I guarantee you will have a lot of fun, and it’ll reconnect you with the love of programming which thrust you into your career in the first place.

All photo credits: Paul Clarke

From Java to JavaScript

Firstly, hello and welcome to my blog. It’s been on my todo list to start this longer than ‘sort out the photos under the bed’, and that’s saying something. I’ve finally got round to starting it now for two reasons. Firstly, I recently read this excellent post outlining the benefits of blogging, such as improved clarity of thought and more effective communication. Secondly, I have started on a new stage of my career, and I want to share my thoughts and experiences.

My background

I’ve been a professional Java developer for five years now, and I’ve decided to take a bit of a gamble. I’m turning my back on the language and have accepted a job as a full-time JavaScript developer. To those that still view JavaScript as a toy language which isn’t for serious programmers, this may seem like a bit of a foolish life decision.

I must confess, if you’d asked me a couple of years ago I may well have thought the same. Even up until a few months ago I hadn’t seriously entertained the idea of giving up Java. Ignoring brief educational forays into Visual Basic, ActionScript and even ADA, Java is the first language I truly knew. From BlueJ at University through to Technical Lead on a suite of web apps in my previous company, I’d always thought of myself as a Java developer. I feel a real sense of flow when I’m flying through an inheritance hierarchy refactor, the NetBeans keyboard shortcuts burned into my finger muscle memory.

There is still a part of me that considers Java to be a ‘proper’ programming language compared to JavaScript. The challenges of multi-threading, the security of strong typing, and the maturity of frameworks such as Spring and Hibernate are not easy to turn one’s back on. Java is a very established and well-respected language, and I believe that despite the growth of languages such as Ruby and Python, it still has many years ahead of it.

The Ascendance of JavaScript

In contrast, although JavaScript first appeared in Netscape 2 way back in 1995, it wasn’t until the appearance of rich web applications like GMail and the proliferation of AJAX a decade later that people started to sit up and take notice.

For me, there were three main reasons why JavaScript is well worth considering as a primary language. Firstly, and most importantly, there is a more direct connection with the thing I’m creating. Coding with Java can be deeply rewarding, but you don’t really get to see very much. Aside from the green bars of passing tests, or the steady stream of logs in the console, positive feedback needs to come from the internal knowledge of a job well done. Coding in JavaScript, on the other hand, usually involves active changes to the DOM - changes that you can see and interact with, changes that feel more tangible somehow. I know that this is a personal preference, but for me this feedback is important.

The second aspect to JavaScript development that tempted me across is the rapid evolution of the language. Despite the appearance of new frameworks like Play, and new features to the language itself with version updates, Java felt quite slow moving to me. JavaScript, by contrast, is the top language on github (at the time of writing), and it shows. There seems to be a new testing framework or MV* framework cropping up each month, and that’s not to mention the lightning pace of Node.js’ evolution. The buzz of a language on the move is both exciting and addictive - go to any JavaScript conference and you’ll see what I mean.

Finally, there is the sheer ubiquity of the language. There is a JavaScript interpreter on almost every web-enabled device. What started out as a quick & dirty language knocked together by Brendan Eich in just 10 days has become the world’s most widely supported programming language. JavaScript might have it’s problems but I don’t see it going anywhere anytime soon.

jQuery - the gateway drug

Like many, my introduction into the pleasures of JavaScript came through the warm and friendly world of jQuery. There were other libraries before jQuery to aid with DOM manipulation (traditionally the most painful and inconsistent aspect of JavaScript development), but jQuery absolutely nailed it.

jQuery revolutionised front-end development for a great many people, but I think everybody who uses it heavily hits a point where they come to realise that learning the library alone and not the language just won’t cut it. This point came for me whilst I was devouring the excellent ‘jQuery in Action’, and read the Appendix which outlined some core JavaScript fundamentals such as closures and object literals. After countless recommendations, I got hold of a copy of Douglas Crockford’s JavaScript - the Good Parts. When I found myself choosing to spend a sunny afternoon sitting up on the Surrey Hills with a beer and said book, I realised that I was really starting to fall for this language.

My conversion came all the quicker thanks to the incredible community surrounding jQuery and JavaScript. I had barely used Twitter up until I read a blog post by @rem on how to recognise a poorly written jQuery plugin and decided to follow him; same story with Paul Irish’s now famous ‘10 things I learned from the jQuery source’ video. Pretty soon, I was following more and more JavaScript luminaries, and I finally discovered what people meant when they quote Twitter as a great resource for learning. I now follow over 300 people, and most of them are JavaScript developers.

I know that these views are not universally shared, and for me this shift of focus simply brings my day to day job more in line with my personal style of programming. For others, Java is a great choice, but for me it felt like programming in a treacle-filled strait jacket. I’m looking forward to a simpler, faster, and in my opinion more elegant life of programming.